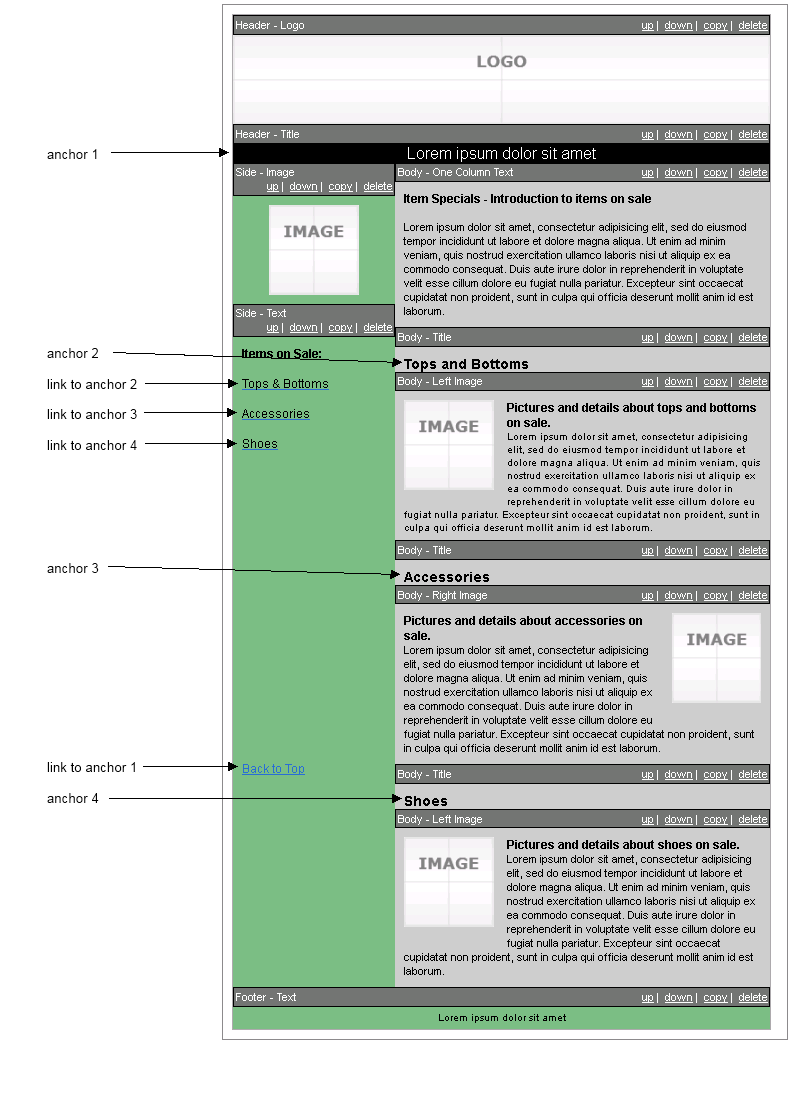
Anchors and links can be used to help your customers navigate from one part of your email to another. They are commonly used when creating an email with a table of contents.
An anchor specifies a location in the email that you want to jump to by clicking on a link. To add an anchor, click on the body section that you want to add the anchor to. When the Edit Text box is displayed, place your cursor where you’d like to add the anchor then click on the icon seen in the red circle below.
When prompted for an Anchor Name, enter a unique name and select Ok when done.
Note: The new text editor allows the use of spaces in the anchor name & may begin with a number.
Next, create the text link. Highlight the text that will navigate you to an anchor and click on the icon that looks like a connected chain link.

One of the following Insert Link windows will appear. The location of the anchor determines which window appears.
- If anchors reside in the section being edited, this window appears.
- If anchors don't reside in the section being edited, this window appears.
Notes: If the anchor needed resides:
- in the section being edited, the anchor name can be found in the Anchors drop down list. Select Ok when done.
- in a different section than the one being edited, the anchor name must be entered manually in the Url box, seen above. You must enter the (#) symbol before the anchor name. For example, #Top; no spaces between # and the anchor name. Select Ok when done.
Remember to test all links and anchors before sending your email.
Here's an example of how anchors and links are used in a template: