A grid has been added to the top half of the Manage/Lists tab. It displays all sources from which you obtained your contacts (lists you've uploaded in .csv format, integration to CounterPoint, CPOnline, subscriptions from WebOptIn or FacebookOptIn, etc). When first navigating to this page the bottom half defaults to an expanded view of the Upload New List option and looks like this:
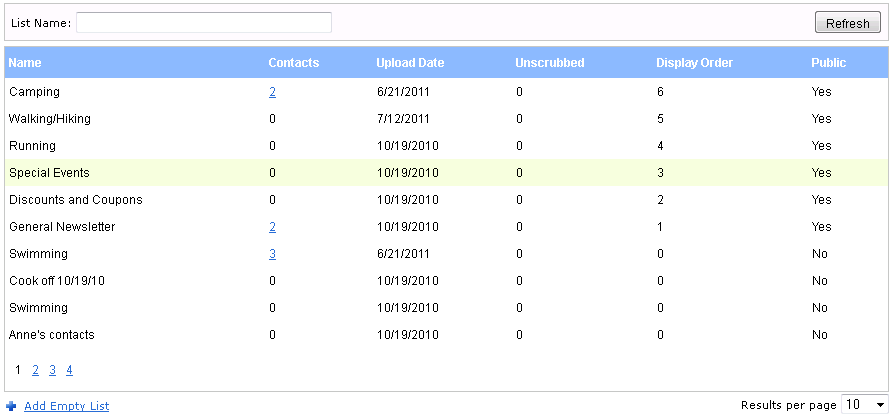
Six Functions can be Executed on a List:
- Edit/Rename a list - Give it a name that can be used on your subscribe page or just change it so it's more descriptive.
- Delete a list - If you have a list you no longer use, it can be deleted. Once a list is deleted it cannot be retrieved and the list name cannot be reused. Any segments using this list will have a recipient count of zero.
- Make it Public - This option is used when choosing to add a list(s) to your subscribe page.
- Assign a Display Order - This option is used when choosing to add a list(s) to your subscribe page.
- View contacts in a list - This Contacts column displays the number of contacts in a list.
- View unscrubbed contacts - The Unscrubbed column displays the number of unscrubbed email addresses in a list.
1 - To Edit/Rename a List:
- Highlight and click the list Name you'd like to edit.
- An Edit List screen is displayed and the Upload New List option collapses, as seen here.
- Change the List Name and click Save.
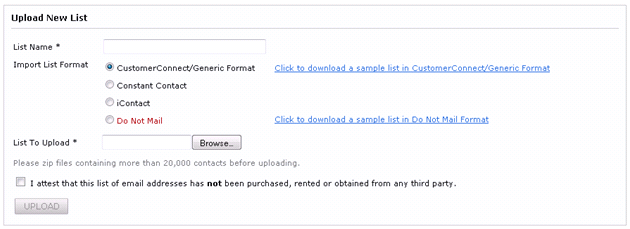
If you need to upload a new list, select the Upload New List link to expand the option.
2 - To Delete a List:
- Highlight and click the list Name you'd like to delete.
- In the Edit List screen, click the Delete button.
Note: Some lists cannot be deleted (CounterPoint, CPOnline and WebOptIn).
- Highlight and click the list Name you'd like to make public.
- In the Edit List screen check the "Public" box.
4 - To Assign a Display Order:
A display order only needs to be assigned to lists who have been made public. The display order determines which order to display the list name in, on your subscribe page. If you do not choose a display order the list names will be displayed alphabetically. A display order is not required. For more information, review the following article: How to Add 'Lists' or 'Areas of Interest' to your subscribe page.
- Highlight and click the list Name you'd like to assign a display order to.
- In the Edit List screen, use the drop down box to assign a number.
5 - To View Contacts in a List:
Click on the number located under the Contacts column. This number navigates you to the Manage/Contacts tab and displays the email address for all contacts in the list selected. This feature is available for all lists that have 1 or more contacts associated to them. You must navigate back to the Manage/Lists tab when you have finished viewing the list of contacts.
6 - To View Unscrubbed Contacts:
The number located under the Unscrubbed column represents the number of contacts that have not been scrubbed for a particular list.